If your vacuum loses suction, your first step is to check for leaks in hoses, seals, and fittings, since these are common causes of airflow disruption. Turn on the vacuum and listen for hissing sounds, or apply soapy water around connections—bubbles signal leaks. Tighten loose fittings or replace damaged hoses and seals as needed. If you still experience issues, exploring further can help identify hidden leaks, so keep going to find out more.
Key Takeaways
- Inspect hoses, seals, and connections for cracks, wear, or looseness; leaks often occur at these points.
- Use soapy water around joints and seals; bubbling indicates a leak needing repair.
- Listen for hissing sounds during operation, which suggest airflow escapes through leaks.
- Turn off the vacuum, seal access points, then test for suction loss or pressure drops with a gauge.
- Repair or replace damaged hoses and seals promptly to restore proper suction before blaming the motor.
Why Leaks Are Often the Main Cause of Vacuum Loss
Leaks are often the primary reason for vacuum loss because even small breaches can allow air or gases to enter the system, breaking the vacuum seal. When you suspect a leak, start with seal replacement to restore integrity. A compromised seal disrupts airflow enhancement, reducing suction and performance. Ensuring all seals are intact and properly fitted is essential for maintaining a strong vacuum. Regularly inspecting and replacing worn or damaged seals can prevent leaks from developing. By focusing on effective seal replacement, you keep the airflow smooth and controlled, preventing vacuum loss. Proper maintenance of components like vacuum pumps ensures optimal performance and reduces the likelihood of leaks. Additionally, understanding the seal integrity and how it impacts overall system performance helps in identifying potential leak points more accurately. Remember, even tiny leaks can considerably impact your vacuum’s efficiency. Taking these steps helps you identify and fix leak points, ensuring consistent suction and peak operation. Incorporating regular maintenance checks can further detect early signs of seal deterioration before leaks become severe. Addressing issues promptly with proper tools can also help prevent long-term damage to the system components.
Signs Your Vacuum Might Have a Leak
If your vacuum isn’t performing like it used to, you might notice a loss of suction power. You could also hear unusual noises or smell persistent odors during use. These signs often point to a leak that needs your attention. Identifying and fixing leaks promptly can help maintain optimal suction efficiency. Regularly inspecting and maintaining your vacuum can prevent common issues caused by wear and tear or minor damages. Additionally, checking for vacuum motor issues can help ensure all components are functioning properly and prevent further performance decline. Being attentive to early warning signs can save you time and costly repairs in the long run. Incorporating preventive measures, such as routine leak detection, can further extend your vacuum’s lifespan and performance.
Loss of Suction Power
A noticeable drop in your vacuum’s suction power is often the first sign that there might be a leak somewhere in the system. If your vacuum isn’t pulling in debris as effectively, start with a filter replacement to ensure airflow isn’t blocked. Also, inspect the power cord for any damage or loose connections, as a faulty cord can cause inconsistent suction. Leaks can develop in hoses, seals, or connections, reducing suction efficiency. These issues often result in a significant loss of power during use. Before considering a motor problem, check these simple components to rule out easy fixes. Maintaining a clean filter and secure cord helps keep your vacuum performing at its best and can prevent unnecessary troubleshooting. Additionally, checking for air purifier maintenance dos and don’ts can offer insights into keeping your device in top shape. Regularly inspecting vacuum seal integrity and ensuring the use of proper oil for airless sprayers can also help identify leaks early and maintain optimal suction performance. Incorporating navigation and mapping checks in robotic vacuums can further prevent issues related to system leaks or blockages that impair suction. Furthermore, understanding the types of vacuum leaks can help pinpoint specific problem areas more accurately.
Unusual Noises During Use
Unusual noises during vacuum use often indicate a leak somewhere in the system. You might notice strange sounds like high-pitched whines or rattling, which can signal issues with vacuum filtration or air leaks. These noises can also be caused by the motor noise changing unexpectedly, hinting at a loss of proper airflow. To diagnose, check these areas:
- Vacuum filtration system – a clogged or damaged filter can cause airflow disruptions, leading to abnormal sounds.
- Hoses and connections – leaks here often produce hissing or whistling noises, indicating air escaping.
- Motor and airflow pathways – worn-out or loose components can generate rattling or grinding sounds, signaling potential leaks affecting performance. Performing a leak test can help confirm whether air leaks are present and prevent unnecessary motor repairs. Additionally, inspecting airflow pathways regularly can help identify subtle leaks before they cause significant issues. Addressing these issues promptly can prevent further damage and restore quiet operation.
Persistent Odors or Leaks
Persistent odors or leaks are clear signs that your vacuum may have a leak somewhere in its system. If you notice strange smells while vacuuming, it could be due to airflow obstruction caused by a clog or a damaged seal. Leaks often allow dirt and debris to escape, resulting in unpleasant odors. Check for blockages in the hose, wand, or filter area. Regular filter replacement helps maintain proper airflow and prevents odors from lingering. If the filter is dirty or clogged, airflow obstruction worsens, leading to leaks and bad smells. Inspect all connections and seals to guarantee they’re tight and intact. Addressing airflow obstruction and replacing filters promptly can eliminate odors and improve your vacuum’s performance. Understanding airflow is essential for troubleshooting vacuum leaks effectively. Additionally, performing a leak test can help identify the source of the problem before you blame the motor. Being familiar with vacuum system components can also aid in more accurate diagnosis and repair. Recognizing airflow pathways can help you pinpoint the exact location of leaks more efficiently. To further diagnose issues, consider using a smoke test, which can visually reveal leaks and airflow disruptions.
Tools You Need to Test for Vacuum Leaks
To effectively detect vacuum leaks, you’ll need the right tools that can quickly identify even the smallest escapes. First, a smoke machine is invaluable for visualizing leaks by filling the system with smoke, revealing tiny cracks. Second, a handheld vacuum pump allows you to create and maintain a consistent vacuum for testing specific connections. Third, specialized vacuum attachments help seal off sections of the system, making pinpointing leaks easier. When using these tools, remember to follow good storage tips—keep your vacuum attachments clean and organized to prevent damage and ensure quick access for future tests. Proper storage helps maintain the accuracy of your tools and prolongs their lifespan, making leak detection faster and more reliable each time.
Where to Look for Vacuum Leaks: Common Spots to Check

Start by inspecting hose connections and seals for cracks or looseness, as these are common leak points. Then, check around the brush roll and belt area for signs of wear or damage that could cause air leaks. Addressing these spots can often resolve most vacuum leaks quickly. Additionally, consulting professional services for complex issues can ensure thorough diagnosis and repair. Remember that understanding vacuum leak detection techniques can help identify less obvious leaks that might be affecting performance. For example, paying attention to astrological influences may reveal patterns in how your vacuum responds, although scientific skepticism reminds us to approach such correlations critically.
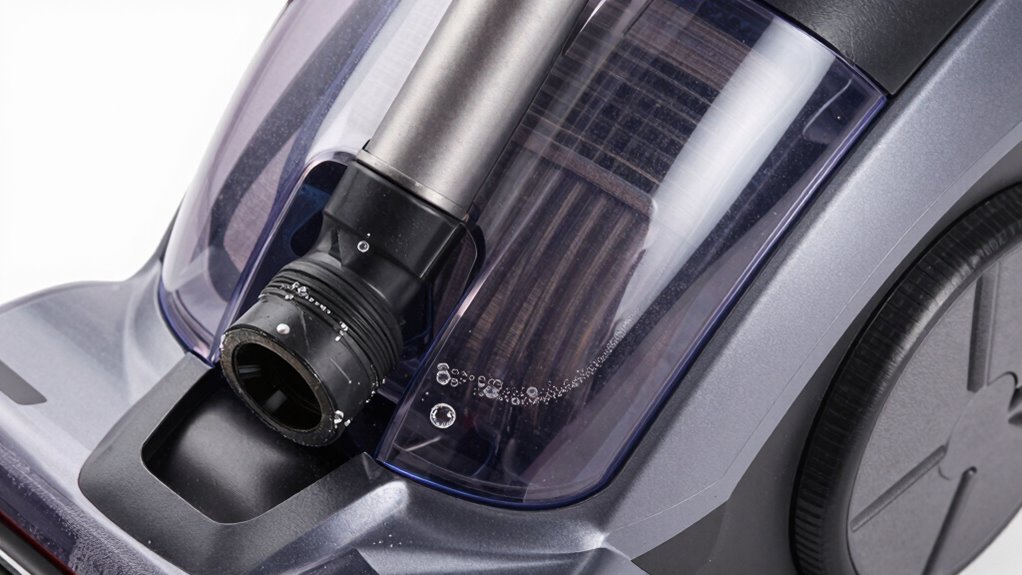
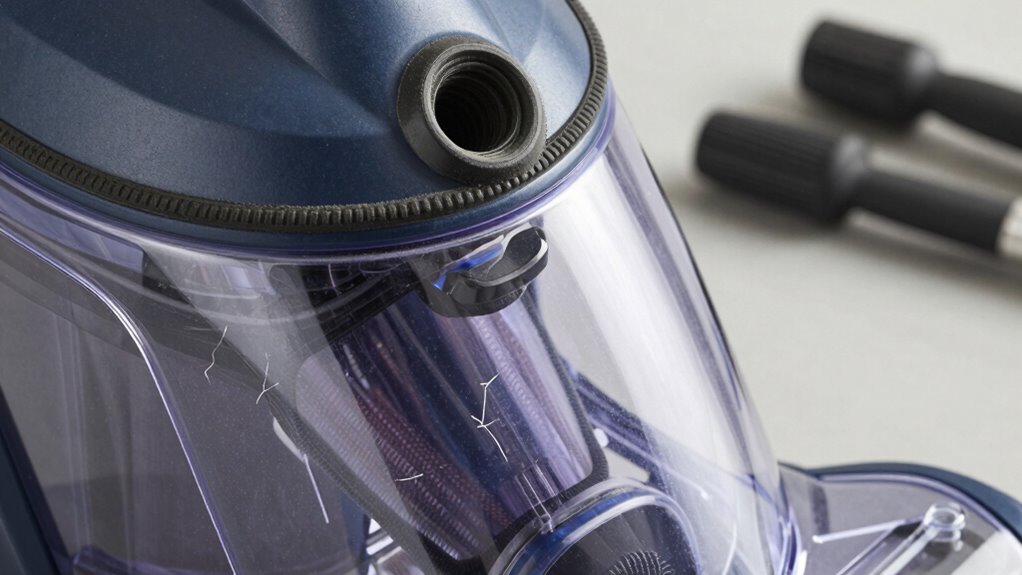
Hose Connections and Seals
Hose connections and seals are common spots where vacuum leaks can occur, so it’s important to examine them carefully. Loose or damaged hose fittings often cause loss of suction, so ensure they’re tightly connected. Next, check the seal integrity around these fittings; cracks or deterioration can compromise the seal and lead to leaks. Lastly, inspect the hoses themselves for cracks, holes, or wear that might allow air to escape.
- Tighten or replace loose hose fittings to restore proper connection.
- Examine seals for cracks or wear, replacing if necessary.
- Look for damage in the hoses and swap out any compromised sections.
Focusing on these areas helps locate leaks that could be causing your vacuum’s loss of suction.
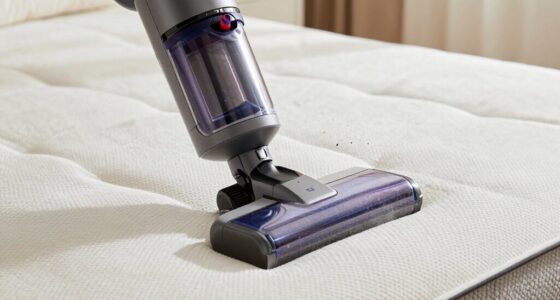
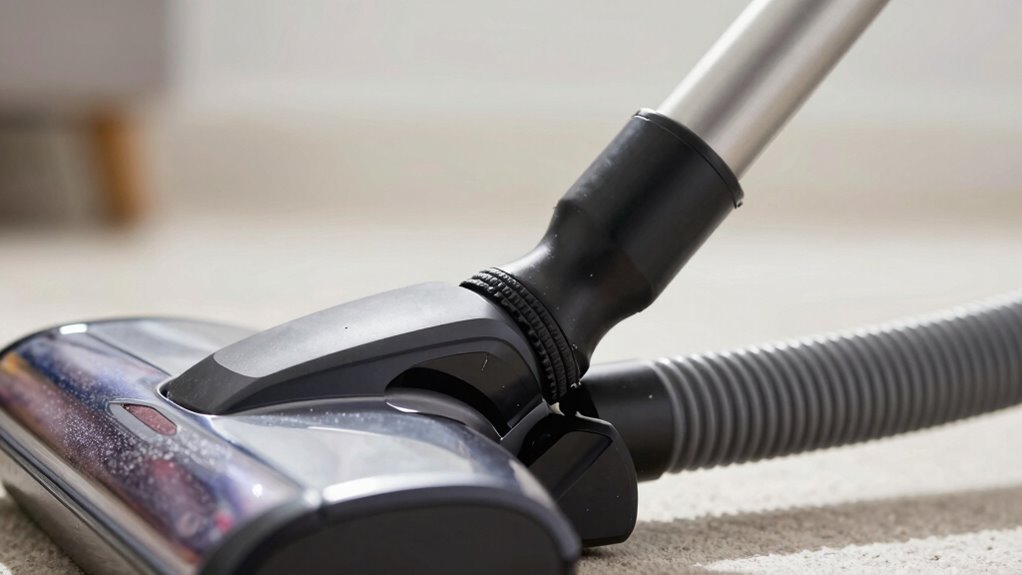
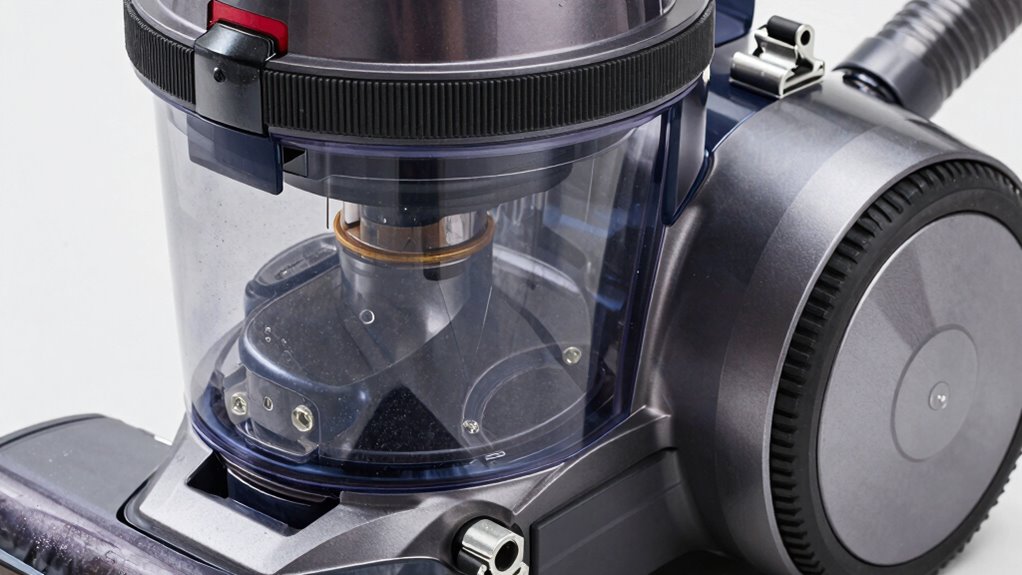
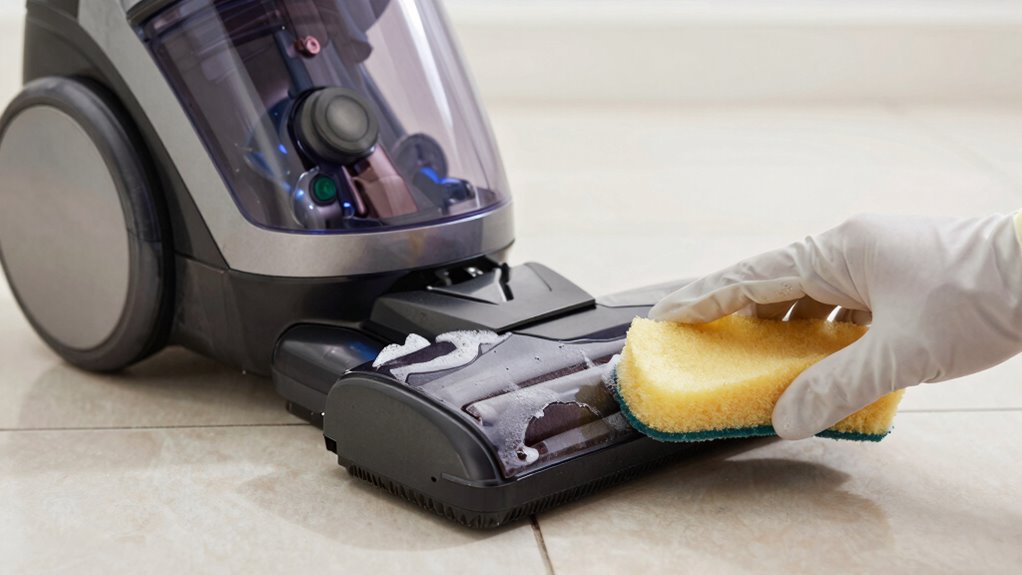
Brush Roll and Belt Area
Ever wonder why your vacuum isn’t picking up debris effectively? The brush roll and belt area are common spots for leaks or issues. If the brush roll isn’t spinning properly, it could be due to brush roll issues or a broken belt. Check if the belt is worn out, cracked, or loose—this often requires belt replacement. Remove the brush roll cover and observe if the belt moves smoothly when the vacuum is on. A slipping or broken belt can prevent the brush roll from turning, reducing suction. Also, inspect the brush roll for obstructions or damage. Replacing a faulty belt or fixing brush roll issues can restore proper airflow and suction, helping your vacuum perform at its best.
How to Perform a Vacuum Leak Test in Easy Steps

Performing a vacuum leak test is a straightforward process that helps guarantee your system is airtight. First, ensure the vacuum design is properly set up and check for any signs of manufacturing defects that could cause leaks. Here’s how to do it:
Perform a vacuum leak test to ensure your system stays airtight and free of leaks.
- Seal all access points and connections tightly, then turn on the vacuum. Listen for hissing sounds that indicate leaks.
- Use a soapy water solution around joints and seals; bubbles will form if there’s a leak.
- Observe pressure gauges to identify any drops in vacuum pressure over time, signaling a leak.
What to Do If You Find a Leak During the Test
When you detect a leak during your vacuum test, the first step is to pinpoint its exact location. Carefully inspect all hoses, connections, and seals where air might escape. Use a soapy water solution to identify small leaks—bubbles will form at the leak site. Once found, tighten fittings or replace damaged hoses to stop the leak. If the leak is near a seal or gasket, reseal or replace it to guarantee a proper vacuum. Addressing leaks promptly is essential for effective vacuum repairs and leak prevention. Ignoring small leaks can lead to further damage or inefficient operation, increasing repair costs later. By fixing leaks early, you maintain ideal suction and prolong your vacuum’s lifespan. Always double-check your repairs before continuing the test.
Troubleshooting When Leaks Aren’t Obvious

Sometimes leaks are difficult to spot because they don’t produce obvious signs like bubbles or hissing sounds. If your vacuum’s suction drops but no clear leak is visible, try these steps:
- Check the air filter for blockages or dirt that could cause uneven airflow, which might mimic a leak.
- Listen carefully for unusual motor noise; a change in sound could indicate airflow issues elsewhere.
- Perform a thorough visual inspection around seams and connection points, using a flashlight to spot tiny leaks that aren’t immediately obvious.
These steps help you identify hidden problems that don’t present typical signs. Remember, subtle airflow disruptions can be caused by minor leaks or clogged filters, affecting overall suction.
When to Consider Replacing Seals or Calling a Professional
If you’ve tried troubleshooting your vacuum for leaks without success, it’s likely time to contemplate replacing the seals or consulting a professional repair. Seal replacement can often resolve persistent leaks caused by worn or damaged seals that simple tests can’t detect. If you notice ongoing suction loss despite checking for obvious issues, replacing the seals might be your best option. However, if you’re unsure how to replace them properly or if the leak persists after seal replacement, it’s wise to seek professional repair. A trained technician can accurately diagnose the problem, ensure proper seal installation, and prevent further damage. Don’t hesitate to call an expert when DIY efforts don’t fix the leak, saving you time and potential additional costs.
Tips to Prevent Future Vacuum Leaks
To keep your vacuum functioning effectively and avoid recurring leaks, taking proactive steps can make a significant difference. Regularly check and replace dirty vacuum filters to maintain peak airflow, which supports motor health. Ensure that seals and connections are tight and undamaged to prevent leaks from forming. Additionally, avoid overusing your vacuum on rough surfaces that can wear out components faster.
Here are some tips to prevent future vacuum leaks:
- Clean or replace vacuum filters every few months to sustain suction power.
- Inspect seals and hoses regularly for cracks or looseness, replacing them as needed.
- Store your vacuum properly, avoiding crushing or bending hoses that can lead to leaks and motor strain.
Maintaining Your Vacuum for Peak Performance

To keep your vacuum running at its best, make sure you regularly clean and replace filters. Always check for air leaks around connections and seals, as even small gaps can reduce performance. Staying on top of these maintenance tasks helps prevent future issues and keeps your system operating smoothly.
Regular Filter Maintenance
Regular filter maintenance is essential for keeping your vacuum operating at its best. Over time, filters trap dust and debris, but they also become clogged, reducing suction. To maintain peak performance, replace filters regularly and inspect the motor for any signs of strain.
Here are three key steps:
- Check the filter for dirt buildup and replace it if it’s visibly clogged or after the recommended interval.
- Inspect the motor for unusual sounds or overheating, which could indicate airflow issues.
- Clean or replace the filter housing to prevent dust recirculation and ensure proper airflow.
Check for Air Leaks
Ever wondered why your vacuum loses suction despite working fine otherwise? The culprit might be an air leak caused by airflow obstruction or dust accumulation. Check hoses, seals, and connections for cracks or gaps, as even small leaks can reduce suction power. Inspect for dust buildup around filters and inlet ports, which can block airflow and create leaks. Clear any obstructions you find, and tighten loose fittings. Sometimes, dust accumulation causes small tears in hoses or seals, leading to leaks. Running your hand along hoses and seals can help detect escaping air. Addressing these issues restores proper airflow, improving suction. Regularly checking for air leaks ensures your vacuum maintains peak performance and prolongs its lifespan.
Frequently Asked Questions
Can a Clogged Filter Cause Vacuum Loss Instead of a Leak?
Yes, a clogged filter can cause vacuum loss by creating airflow restriction. When your filter blockage prevents proper airflow, the vacuum motor struggles to generate suction effectively. Check and clean or replace the filter regularly to restore proper airflow. Ignoring this simple step might lead you to mistakenly think there’s a leak or motor issue, but often, addressing the filter blockage solves the problem quickly and easily.
How Often Should I Perform a Leak Test on My Vacuum?
You should perform a leak test on your vacuum every three to six months to catch issues early. Visualize the hose and seals as your vacuum’s lifeline—any tiny crack or loose connection can sabotage suction. Use simple leak detection methods like listening for hissing sounds or applying soapy water to suspect areas. Regular maintenance schedules help prevent unexpected breakdowns, keeping your vacuum running smoothly and efficiently.
Are There Any Signs That Indicate a Motor Failure Instead of a Leak?
If your vacuum’s motor is failing, you’ll notice signs like motor overheating or unusual noises during operation. When the motor gets too hot or makes grinding or squealing sounds, it indicates potential failure. These signs often appear before complete motor failure, so pay attention. If you see these symptoms, check for leaks or blockages first, but don’t ignore persistent overheating or strange noises—they point to motor issues.
What Safety Precautions Should I Take During a Leak Test?
When performing a leak test, always wear protective gear like gloves and safety goggles to shield yourself from debris or dust. Guarantee proper ventilation safety by working in a well-ventilated area to avoid inhaling dust particles. For example, in a case where a vacuum technician ignored safety precautions, they inhaled dust causing respiratory issues. Always prioritize safety, ventilate the area, and wear protective gear to prevent accidents during testing.
Is It Possible for Minor Leaks to Affect Vacuum Performance Significantly?
Yes, minor leaks can substantially affect vacuum efficiency. Even small leaks allow air to escape, reducing suction power and making your vacuum less effective. You might not notice the leaks at first, but over time, they weaken performance. To keep your vacuum working at its best, regularly check for and seal minor leaks. Addressing these small issues ensures consistent vacuum efficiency and prolongs the life of your appliance.
Conclusion
Before blaming your vacuum’s motor, remember that leaks are often the real culprit. By performing a simple leak test, you might uncover a quick fix instead of costly repairs. Sometimes, what seems like a motor problem is just a small leak hiding in plain sight. Trust the process, stay vigilant, and you’ll keep your vacuum running smoothly. After all, addressing the root cause often reveals that things aren’t always as broken as they seem.