
If your robot vacuum isn’t charging, start by checking your power outlet and ensuring the charging station is plugged in and on a flat surface. Inspect the charging contacts for dirt or corrosion and clean them gently. Make sure the robot docks correctly without obstructions. Reset both the vacuum and dock if necessary, and check for any hardware damage or updates. For more detailed steps, explore the seven-point dock troubleshooting process to identify what’s causing the issue.
Key Takeaways
- Check and clean charging contacts on both the robot and dock for debris and corrosion.
- Verify the power source, outlets, and charging cable for proper function and damage.
- Ensure the dock is correctly positioned, stable, and firmware/software is up-to-date.
- Reset the vacuum and dock system by powering off, unplugging, then reconnecting and restarting.
- Inspect for physical damage or corrosion; consider professional repair or dock replacement if issues persist.
Why Is My Robot Vacuum Not Charging?
If your robot vacuum isn’t charging, the problem could stem from a simple issue like a loose connection or a dirty charging port. Charging issues are common and often easy to fix. Check that the charging contacts on both the robot vacuum and the dock are clean and free of debris. Dirt, dust, or grime can prevent proper contact, stopping the vacuum from charging. Ensure the charging port is not damaged or corroded. Sometimes, the issue is as simple as repositioning the robot vacuum correctly on its dock. If the robot isn’t aligned properly, it won’t make the necessary contact to charge. Addressing these basic connection and cleanliness issues can resolve many charging problems and keep your robot vacuum ready for use. Additionally, inspecting the charging process and ensuring it’s functioning correctly can help identify underlying issues and prevent future charging problems. Regularly checking the charging contacts for corrosion or damage can also help maintain optimal charging performance. Furthermore, understanding the power supply requirements can prevent interruptions in the charging cycle. Ensuring the power source is stable and providing consistent voltage can also make a significant difference in successful charging. Performing a navigation and mapping check can help ensure the robot is correctly aligned with the dock for proper charging contact.
Make Sure the Power Outlet and Power Supply Are Working
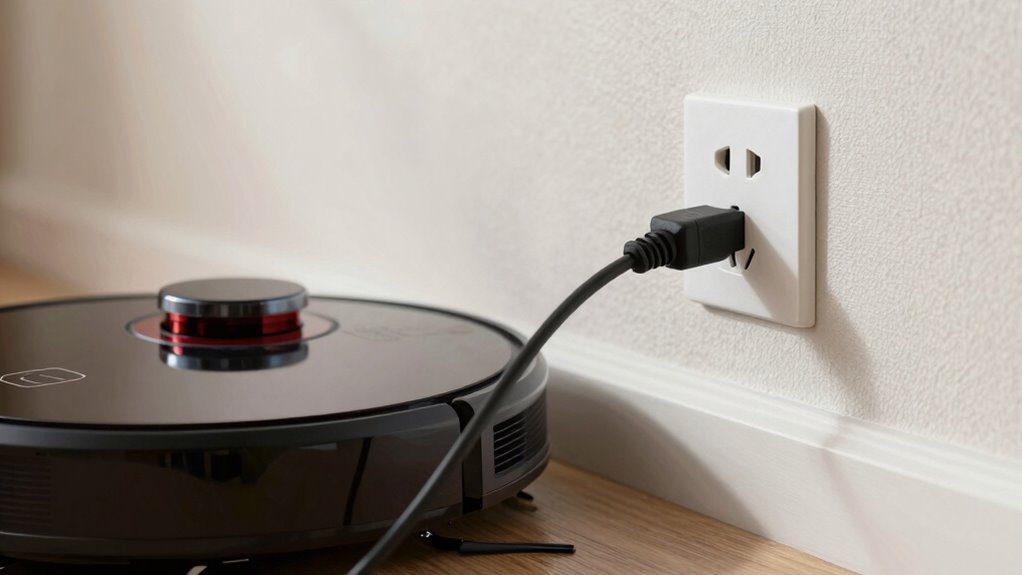
Sometimes, the issue isn’t with the vacuum itself but with the power source. First, check that the power outlet is working by plugging in another device, like a lamp or charger. If that device doesn’t turn on, the outlet might be faulty or switched off. Also, inspect the power supply, including the charging cord and adapter, for any visible damage or loose connections. Make sure the cord is securely plugged into both the outlet and the charging station. If you’re using a power strip, try plugging directly into the wall socket instead. Sometimes, the power supply may be faulty or incompatible, so testing with a different charger or outlet can help determine if it’s the source of the problem. Additionally, verify that the power specifications of your charger match the vacuum’s requirements to ensure proper functioning. Understanding the reliance on cloud services can also help identify potential vulnerabilities if your device depends on network connectivity for charging or updates. Conducting a voltage test on the outlet can further confirm its operational status. Keep in mind that some home electrical systems may have issues like circuit breaker trips that could affect power delivery. Moreover, checking for any grounding issues can help prevent electrical faults that interfere with charging.
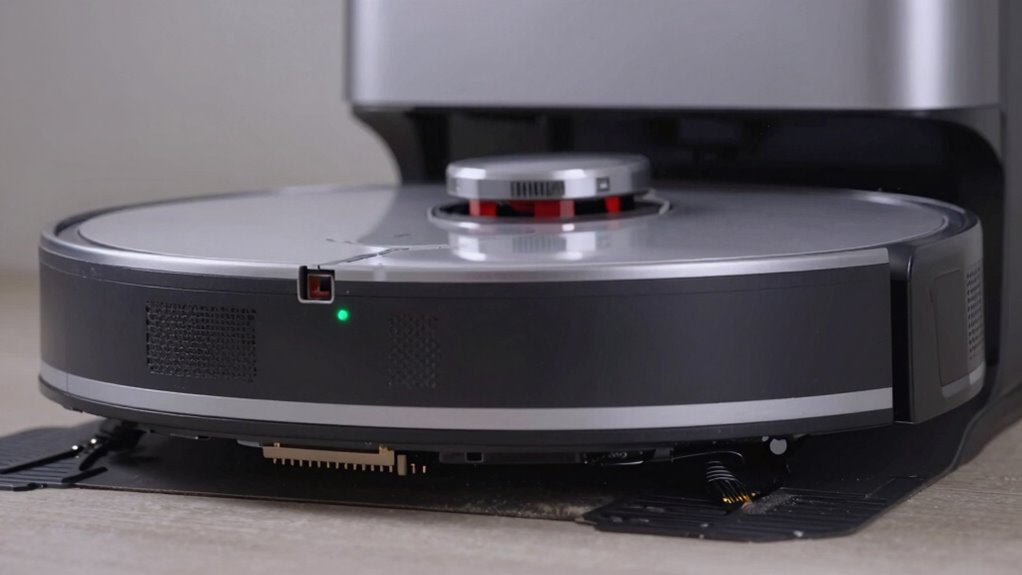
Check That the Vacuum Is Docking Properly

To make certain your robot vacuum charges properly, you need to confirm it’s docking correctly at the charging station. Start by checking the docking station placement—ensure it’s in a flat, stable spot with enough clearance around it. Proper alignment is essential; the robot needs to approach the station straight and line up with the charging contacts. If the station is placed too far from walls or furniture, or at an awkward angle, your vacuum may struggle to dock properly. Make sure there are no obstacles blocking the path. If your robot isn’t docking consistently, try repositioning the station for better alignment and easier access. Correct placement and alignment are key to ensuring your vacuum docks securely and charges effectively. Additionally, European cloud infrastructure can provide more reliable connectivity and support for your smart home devices. Ensuring your network stability can also help maintain proper communication between your robot and the charging station. Regularly cleaning the charging contacts and sensors can further improve docking success and device performance.
Inspect the Charging Contacts and Clean Them

After confirming your robot vacuum is docking correctly, the next step is to inspect the charging contacts. These are the metal points on both the robot and the charging station that transfer power. Over time, dirt, dust, or debris can accumulate on the charging contacts, preventing proper connection. Use a soft cloth or a cotton swab slightly dampened with rubbing alcohol to clean the contacts gently. Avoid abrasive tools that could damage the metal. Ensuring the contacts are clean and free of obstructions helps improve the connection, which is essential for charging. Regular maintenance of charging contacts can significantly extend the lifespan of your device. Additionally, contact corrosion can develop if moisture is present, so keeping the area dry is important for optimal performance. Keeping an eye on connection quality can help identify issues early before they affect charging performance. To further prevent issues, consider inspecting the charging station periodically for dirt or debris that may interfere with the connection.
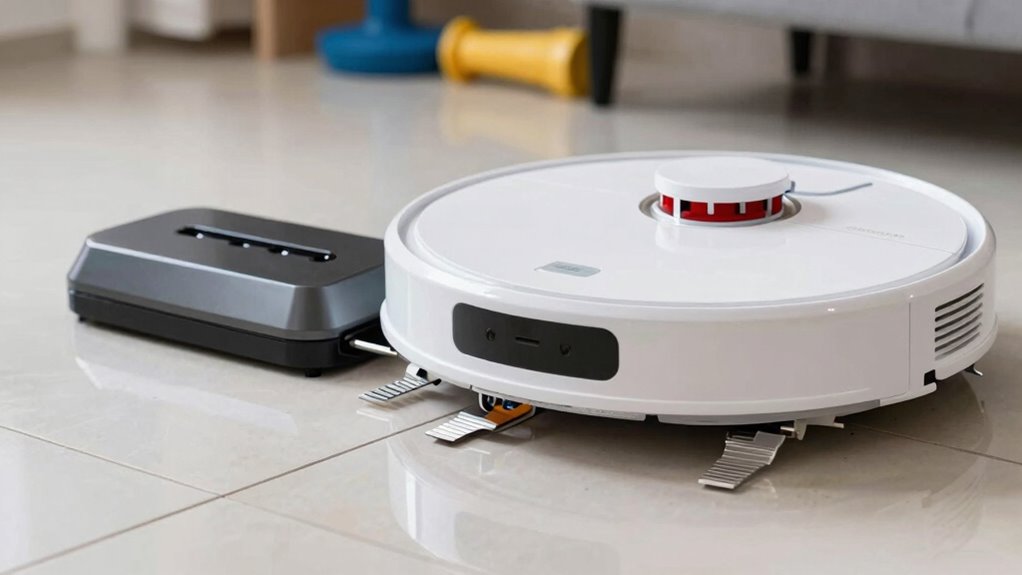
Ensure the Docking Station Isn’t Obstructed or Damaged

A clear and unobstructed path between your robot vacuum and the docking station is essential for proper charging. Check that the docking station isn’t obstructed or damaged, which can interfere with connection. Proper docking station placement ensures it’s in an open, flat area free from furniture or cords. Regularly inspect for visible damage like cracks or loose parts. Obstruction prevention is key—remove objects that block the station’s sensors or charging contacts. Use the table below to verify common issues:
| Docking Station Placement | Obstruction Prevention |
|---|---|
| Place on a flat surface | Clear surrounding area |
| Keep away from cords | Remove clutter nearby |
| Avoid high traffic zones | Check for physical damage |
| Maintain open access | Ensure sensors aren’t blocked |
| Position at wall edge | Regularly clean contacts |
Additionally, ensuring the placement of the dock is optimal can prevent charging issues and improve overall performance. Proper placement can significantly influence the effectiveness of the charging process.
Verify Compatibility and Update Firmware if Needed

Ensuring your robot vacuum is compatible with your charging station is crucial for proper operation. Check that you have the right compatible accessories, such as the correct charging dock and power adapters, designed for your model. Sometimes, firmware updates are necessary to fix bugs or improve charging performance. Vacuum features like compatibility play a vital role in maintaining your device’s functionality. Regularly updating your device with the latest connected home fitness software can also help prevent such issues from occurring. Additionally, verifying affiliate relationships ensures that your device accessories are genuine and supported. To verify compatibility and update firmware:
- Confirm your vacuum model supports your docking station
- Visit the manufacturer’s website for firmware updates
- Install any available updates to guarantee optimal functionality
- Ensure that your device’s hardware components are in good working condition to prevent charging issues
- Understanding device compatibility guidelines can help identify potential mismatches early and avoid unnecessary troubleshooting.
Keeping firmware current helps resolve charging issues and enhances overall performance. If your accessories aren’t compatible or firmware is outdated, your robot may struggle to charge properly. Regularly checking for updates and verifying accessory compatibility can save you time and prevent future problems.
Reset Your Robot Vacuum and Docking Station
Start by resetting both your robot vacuum and its docking station to clear any temporary glitches. Make sure to power cycle each device properly by unplugging them, waiting a few seconds, and then plugging them back in. This simple step can often resolve charging issues and get your devices working again.
Reset Both Devices
If your robot vacuum isn’t charging properly, resetting both the device and the docking station can often resolve the issue. This step helps refresh the system, guaranteeing proper battery maintenance and applying any pending firmware updates that might be causing charging problems. To reset, power off both devices, unplug the docking station, and wait a few minutes before reconnecting everything. This process clears minor glitches that could interfere with charging.
- Check for firmware updates to confirm your robot operates with the latest software.
- Clean the charging contacts to improve connection quality.
- Verify power sources and connections to rule out electrical issues.
Resetting both devices often restores proper communication, helping your robot dock and charge correctly again.
Power Cycle Properly
Power cycling your robot vacuum and docking station is a straightforward way to resolve charging issues. This process involves turning off both devices, waiting a few seconds, and then turning them back on. Power cycling effectively performs a device reboot, clearing minor glitches that may prevent proper charging. To do this, unplug the charging station from the power outlet, then turn off your robot vacuum. Wait at least 10 seconds before plugging the station back in and turning on your vacuum. Once both devices reboot, place your robot on the dock and see if it starts charging properly. Power cycling resets the system, often fixing connectivity or power transfer problems that simple resets can’t resolve. This quick step can often restore normal charging function without further troubleshooting.
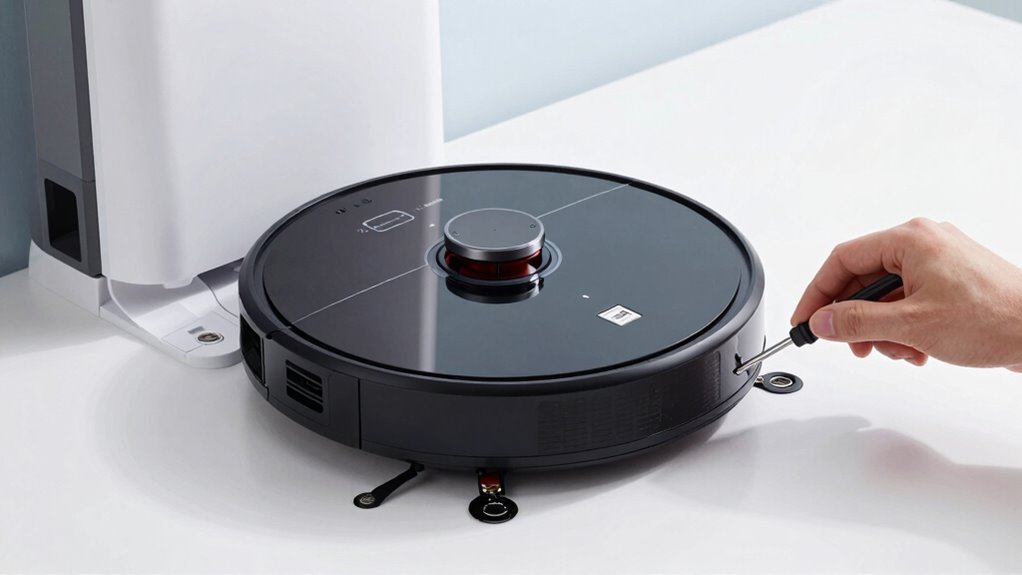
Identify Hardware Problems and When to Replace Parts
Sometimes, hardware issues like damaged charging ports, worn-out batteries, or faulty power adapters can prevent your robot vacuum from charging properly. You’ll need to inspect these parts closely to determine if they’re causing the problem. Replacing the defective components promptly can get your vacuum back to working order.
Damaged Charging Ports
Damaged charging ports are a common hardware issue that can prevent your robot vacuum from charging properly. Over time, charging port damage or connector corrosion can disrupt the electrical connection. If you notice the vacuum isn’t charging despite being plugged in correctly, the port may be compromised. Look for visible signs like bent pins, debris, or corrosion buildup.
- Check for connector corrosion or dirt that blocks contact.
- Inspect for physical damage such as bent or broken pins.
- Test the port with a different charger to rule out external issues.
If you find corrosion or physical damage, replacing the charging port might be necessary. Damaged ports typically require professional repair or replacement to restore proper charging. Addressing these hardware problems promptly can prevent further damage and ensure your robot vacuum stays operational.
Worn Out Battery
A worn-out battery is a common reason your robot vacuum may struggle to hold a charge or operate effectively. Over time, battery degradation occurs from repeated charging cycles, reducing the battery’s capacity and efficiency. If your vacuum isn’t holding a charge or runs out quickly, the battery may need replacing. Typically, a battery’s lifespan is measured in charging cycles, and after several hundred cycles, performance drops markedly. You might notice longer charging times or shorter run times. In such cases, it’s time to think about replacing the battery to restore ideal function. Always check your manufacturer’s recommendations for battery replacement intervals. Replacing a worn-out battery can often solve charging issues and help your robot vacuum perform like new again.
Faulty Power Adapter
If your robot vacuum isn’t charging despite a new battery, the power adapter might be the culprit. Faulty power adapters or damaged charging cables can prevent proper power flow. To diagnose, check these key signs:
- Damaged charging cable: Look for frays, cuts, or bent connectors.
- Loose or broken power adapter plug: Ensure it fits securely into the outlet.
- No indicator lights: When plugged in, if the power adapter shows no lights, it may be dead.
If you notice any of these issues, replacing the power adapter or charging cable is necessary. Using a faulty power adapter can damage your robot vacuum or cause inconsistent charging, so don’t delay replacing it when needed.
Check App Settings or Software That Might Affect Charging

Sometimes, app settings or software glitches can interfere with your robot vacuum’s charging process. Outdated app versions or recent app updates might cause compatibility issues, preventing the vacuum from recognizing the charging dock or starting the charging cycle. Check if your app is up to date; developers often release updates to fix bugs and improve performance. Also, review your app’s settings to ensure that no restrictions are in place that might disable charging or docking features. Resetting or reinstalling the app can help resolve minor software glitches. Keep in mind that software issues can sometimes cause the robot to miscommunicate with the dock, so staying current with app updates and verifying settings can make a significant difference in resolving charging problems.
When Should You Call a Professional or Replace the Dock?
If your robot vacuum still won’t charge after troubleshooting, it might be time to contemplate replacing the dock or calling a professional. Look for signs like visible damage, corrosion, or persistent connection issues that can’t be fixed easily. When unsure, consulting an expert can save you time and prevent further damage.
Signs You Need Replacement
When your robot vacuum consistently struggles to charge or stops docking altogether, it’s a clear sign that the charging dock may need replacement. Over time, the battery lifespan decreases, making the charging indicator unreliable. If your device shows inconsistent charging signals or the dock fails to recognize the vacuum, replacement might be necessary.
Watch for these signs:
- The charging indicator remains off or flickers frequently
- Your vacuum’s battery no longer holds a full charge after multiple attempts
- The dock shows visible damage or corrosion
If you notice any of these issues, it’s likely time to contemplate replacing the dock to restore proper charging and avoid further inconvenience.
When to Call Experts
Deciding to call a professional or replace the dock becomes necessary when troubleshooting steps fail to address charging issues. If you’ve followed basic maintenance tips and tried simple DIY fixes like cleaning contacts or resetting the robot, but the problem persists, it’s time to seek expert help. Professionals can diagnose wiring issues, internal component failures, or damaged docks that aren’t visible to the untrained eye. Attempting complex repairs without proper tools or knowledge might cause more damage. Replacing the dock yourself isn’t advised unless you’re comfortable with electronics. When your robot’s charging problems persist despite your efforts, calling in an expert ensures a safe, reliable fix, preventing further damage and extending your vacuum’s lifespan.
Frequently Asked Questions
How Do I Know if My Charging Station Is Compatible With My Robot Vacuum?
You can determine if your charging station is compatible with your robot vacuum by checking the manufacturer’s specifications for both. Look for compatibility details on the packaging or official website. If you’re unsure, contact customer support or consult the user manual. Keep in mind that software updates troubleshooting can sometimes resolve charging issues, so ensure your vacuum’s firmware is up to date for maximum compatibility and performance.
Can Software Updates Fix Charging Issues Without Hardware Replacement?
Software updates and firmware fixes can often resolve charging issues, acting like a tune-up for your vacuum’s brain. Instead of hardware replacements, these updates can improve communication between your robot and dock, fixing bugs that cause charging problems. You see, just like updating your phone software enhances performance, keeping your vacuum’s firmware current can restore proper charging without costly repairs. So, yes, software updates can sometimes fix charging issues effectively.
What Are Signs of Internal Hardware Failure in a Robot Vacuum?
If your robot vacuum shows signs of internal hardware failure, you might notice sensor malfunction, such as failure to detect obstacles or dock properly. Motor failure could cause the vacuum to move sluggishly or not at all. You may also hear unusual noises or see inconsistent cleaning patterns. These issues point to hardware problems that typically require professional repair or replacement of faulty components to restore full functionality.
How Often Should I Clean the Charging Contacts for Optimal Performance?
You should clean the charging contacts every 2-4 weeks to guarantee peak performance. Regular charging contact maintenance prevents dirt and debris buildup, which can interfere with charging and reduce your vacuum’s battery lifespan. Use a soft, damp cloth or a small brush to gently remove grime from the contacts. Keeping them clean helps maintain a strong connection, prolongs your vacuum’s battery life, and ensures it charges efficiently every time.
Is It Safe to Repair or Replace Parts Myself or Should I Seek Professional Help?
You can attempt DIY repairs if you’re comfortable with small electronics, but for complex issues or if you’re unsure, it’s safer to seek professional assistance. Replacing parts yourself might risk damaging your robot or voiding warranties. When in doubt, consulting a professional ensures the repair is done correctly and safely. Always follow manufacturer guidelines, and don’t hesitate to get expert help to avoid further problems.
Conclusion
When your robot vacuum won’t charge, troubleshooting can save you time and money. You might fix the issue with a simple cleaning or reset, but sometimes, the problem’s more serious—hardware failure or worn-out parts. It’s a small inconvenience now, yet ignoring it could lead to bigger repairs later. Stay vigilant, follow the steps, and know when to call a professional. After all, a fully charged vacuum keeps your home spotless—and that’s worth the effort.