If your dust extractor’s auto-clean isn’t working, start by checking the filters for dirt or clogs, and clean or replace them if needed. Guarantee sensors are clean, properly aligned, and calibrated since debris or misalignment can prevent auto-clean from activating. Also, inspect electrical connections for dust buildup or faults. Regular maintenance like these fixes often resolve auto-clean issues. Keep exploring for more tips to maintain peak performance and prevent future problems.
Key Takeaways
- Check and clean sensors and detection signals for debris or obstructions.
- Inspect and replace or clean filters every 3-6 months to prevent clogs.
- Verify sensor alignment and calibration to ensure accurate auto-clean activation.
- Examine electrical connections for faults or dust buildup that may disrupt system operation.
- Conduct system diagnostics and monitor auto-clean cycles for errors or malfunctions.

4 Pack DWV9330 Replacement Vacuum Filter Compatible with DeWalt DWV010 & DWV012 Dust Extractor – Part # DWV9330 (for DeWalt 8 Gallon & 12 Gallon)
Compatible with DEWALT DWV010 (8 gallon) & DWV012 (12 gallon) dust extractor.
As an affiliate, we earn on qualifying purchases.
As an affiliate, we earn on qualifying purchases.
Why Your Auto-Clean Might Stop Working
If your dust extractor’s auto-clean feature suddenly stops working, the issue is often related to a clogged sensor or a buildup of debris that prevents proper operation. Regular filter maintenance is vital; a dirty filter can trigger false alerts or hinder the auto-clean process. Check for blockages or debris on the sensors and clean them carefully. Additionally, motor troubleshooting might reveal issues like overheating or worn brushes that affect auto-clean performance. Dust, dirt, or debris can interfere with sensor signals and motor function, causing auto-clean to stop working. Ensuring your filters are clean and sensors are unobstructed helps maintain system efficiency. Proper maintenance of your dust extractor is key to preventing issues and extending its lifespan. Conducting routine system diagnostics can help identify underlying problems early before they impact auto-clean functionality. Additionally, sensor calibration may be necessary if the sensors are misaligned or inaccurate, further improving reliability. Performing preventive maintenance can help catch developing issues early and avoid unexpected failures. Regularly inspecting electrical connections can also prevent potential faults that might disrupt auto-clean performance. If these steps don’t resolve the problem, it might be time to inspect the motor for potential faults or seek professional help.

Bosch Vacuum Cleaner VAC090AH Portable 9 Gallon Dust Extractor with Auto Filter Clean and HEPA Filter
POWER: With strong airflow and suction power, the BOSCH VAC090AH dust collector delivers a maximum 150 cubic feet…
As an affiliate, we earn on qualifying purchases.
As an affiliate, we earn on qualifying purchases.
How Auto-Clean Normally Works in Your Dust Extractor

The auto-clean feature in your dust extractor is designed to automatically maintain ideal filter performance by removing accumulated dust and debris. During operation, the system detects when the filter becomes clogged or reaches a certain level of dust buildup, prompting the auto-clean cycle. This cycle typically involves a brief burst of compressed air or vibration to dislodge dust from the filter fibers, ensuring continued efficient dust collection. By automating this process, your dust extractor reduces the need for manual filter maintenance and minimizes downtime. Proper auto-clean function helps keep airflow steady and prevents filter blockages, which can compromise dust collection. Additionally, awareness of filter maintenance and how airflow impacts overall dust extraction efficiency can help you troubleshoot more effectively. Knowing how sensor detection works can also help diagnose issues with auto-clean activation or failure. Regularly inspecting the auto-clean system components may prevent unexpected malfunctions and ensure consistent operation.
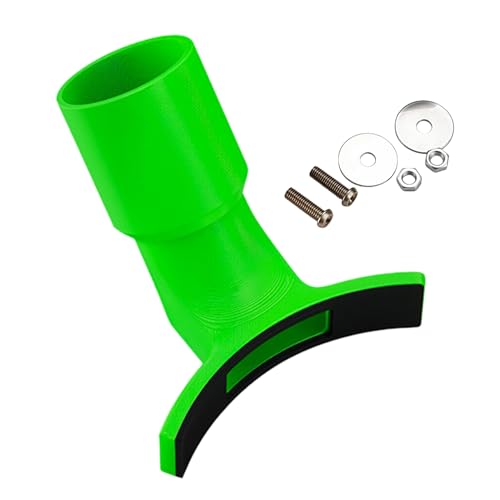
Dust Extractor Adapter – Double-Port Dust Collector Coupler, Tool-Free Universal Adapter For Circular Saw, Jigsaw, Router & Sander, Improves Dusts Collection For Woodworking Machines
Rapid Dust Removal System: This vacuum connector for miter saw optimizes airflow path to expel dust quickly, minimizing…
As an affiliate, we earn on qualifying purchases.
As an affiliate, we earn on qualifying purchases.
Troubleshooting Auto-Clean Failures: Common Causes and Fixes
When your dust extractor’s auto-clean feature stops working, it’s often due to common issues that prevent the system from functioning correctly. One frequent cause is neglected filter maintenance, which can clog the system and hinder auto-clean performance. Make sure your filters are clean and properly installed. Proper filter maintenance is essential for reliable operation, and neglecting it can cause system failures. Regularly inspecting and replacing filters as needed helps prevent such issues. Another culprit is sensor calibration; if sensors aren’t calibrated correctly, the system may not detect when cleaning is needed or may trigger false alarms. Check the sensor calibration settings and re-calibrate if necessary. Also, inspect for any dirt or debris blocking sensors or affecting filter performance. Addressing these issues helps restore functionality. Ensuring your filter performance and correct sensor calibration are key to ensuring your auto-clean feature works reliably and efficiently. Additionally, consulting your dust extractor’s manufacturer guidelines can help identify specific troubleshooting steps tailored to your model. Ensuring your system’s sensor accuracy is critical, as faulty sensors are a common reason for auto-clean failures. Regularly checking your system’s connections and ensuring the internal components are free from dust buildup can also prevent malfunctions.

BUCKTOOL 1HP 6.5AMP Wall-mount Dust Collector with Remote Control and 2-micron Dust Filter Bag 550CFM Air Flow DC30A-1
TEFC Induction Motor: Benefited from the Totally Enclosed, Fan-Cooled cover design and advantage of the induction motor, our…
As an affiliate, we earn on qualifying purchases.
As an affiliate, we earn on qualifying purchases.
When and How to Clean or Replace Filters for Best Performance

Regularly cleaning or replacing your dust extractor’s filters is essential to maintain ideal performance. Proper filter maintenance guarantees your system runs efficiently and prevents clogs that can hinder auto-cleaning. Follow the manufacturer’s recommended replacement schedule, usually every 3 to 6 months, but adjust based on usage. Check filters frequently for signs of dirt buildup, tears, or damage. When filters look clogged or airflow decreases, clean them if they’re reusable, or replace them if they’re disposable. Avoid waiting too long to replace filters, as dirty or worn filters can strain the motor and reduce dust collection efficiency. Consistent filter maintenance keeps your system operating smoothly and extends its lifespan, ensuring you get the best performance from your dust extractor. Additionally, understanding ventilation considerations can help optimize your dust extraction setup for safer and more efficient operation. Regularly inspecting filters and airflow dynamics can further improve your system’s performance and longevity, especially when combined with proper filter replacement schedules. Being aware of dust buildup signs can also help you identify when it’s time for maintenance before issues arise. Incorporating filter lifespan estimates into your routine can assist in planning replacements proactively.
Tips to Keep Your Auto-Clean Function Running Smoothly

Maintaining clean filters is just the first step; guaranteeing your auto-clean function works properly requires ongoing attention. Regular filter maintenance is essential—check and clean filters frequently to prevent buildup that can hinder auto-clean performance. Additionally, sensor calibration plays a key role; ensure sensors are correctly calibrated so they accurately detect when cleaning is needed. Dust and debris can cause sensors to misfire, so clean sensor surfaces and follow calibration procedures as recommended by your manufacturer. Keep an eye on auto-clean cycles and respond promptly to any error alerts. Monitoring sensor performance and responding to issues promptly can help prevent malfunctions. Proper filter maintenance and sensor calibration are crucial for reliable operation, and staying vigilant can help you identify potential problems early. By staying proactive with filter maintenance and sensor calibration, you’ll help your dust extractor operate smoothly, reducing downtime and extending its lifespan. Proper power backup ensures your equipment remains operational during outages, minimizing interruptions. Regular system diagnostics can also help detect underlying issues before they cause failures. Consistent care ensures your auto-clean feature stays reliable and efficient.
Frequently Asked Questions
Can Auto-Clean Failure Be Caused by Electrical Issues?
Yes, auto-clean failures can be caused by electrical issues. If there’s a problem with the electrical wiring or a circuit failure, it can prevent the auto-clean feature from activating properly. You should check the wiring connections for any loose or damaged wires and inspect the circuit breaker to verify it’s functioning correctly. Addressing these electrical issues may restore your dust extractor’s auto-clean function.
Does Humidity Affect the Auto-Clean System’s Performance?
Humidity interference can indeed throw a wrench in your auto-clean system’s performance. When moisture impacts the internal components, it’s like trying to dry paint with a wet brush—things don’t work smoothly. Excess humidity can cause electrical connections to falter or sensors to misread, halting auto-clean functions. To keep your dust extractor humming, guarantee a dry environment or consider using dehumidifiers to eliminate moisture impact and maintain ideal auto-clean performance.
Are There Specific Signs Indicating Filter Replacement Is Needed?
Yes, there are specific signs indicating you need to replace the filter. If you notice poor suction, increased dust buildup, or the auto-clean system isn’t functioning properly, it’s time for a filter inspection. Regularly checking for excessive dust accumulation and visible damage helps guarantee peak performance. Replacing the filter when these signs appear keeps your dust extractor running efficiently and prevents further issues.
How Often Should I Perform Maintenance on My Dust Extractor?
You should follow a regular maintenance schedule, inspecting filters at least once a month to guarantee peak performance. Clean or replace filters when they appear dirty or clogged, typically every 3 to 6 months, depending on usage. Regular filter inspection helps prevent auto-clean issues and keeps your dust extractor running smoothly. Don’t forget to check the filter’s condition often, especially during high-demand periods, to avoid downtime.
Is It Safe to Manually Override the Auto-Clean Feature?
While it might seem tempting to give the auto-clean a gentle nudge with a manual override, you should tread carefully. If you choose to do so, make certain you’re aware of safety considerations to avoid damage or injury. Always consult your dust extractor’s manual first, and consider whether bypassing the auto-clean could compromise safety or void warranties. When in doubt, reach out to the manufacturer for guidance.
Conclusion
Just like the steady heartbeat of a well-tuned engine, your dust extractor’s auto-clean keeps everything running smoothly. When it stalls, it’s a sign you need to check filters, connections, or reset the system. Think of it as tending to a garden—you must regularly prune and care for it to flourish. With these quick troubleshooting steps, you’re the master mechanic, ensuring your dust extractor stays in top shape, ready to tackle any mess that comes your way.