To avoid guesswork or overbuying, check your vacuum’s performance regularly. Replace the filter every 3-6 months, or sooner if you notice a drop in suction, dust buildup, or musty smells. Many models have indicator lights that signal when it’s time for a change—green means good, red or blinking yellow mean you should replace soon. Staying attentive to these signs guarantees your vacuum runs smoothly; more tips await if you keep exploring.
Key Takeaways
- Replace filters every 3-6 months, or sooner if performance declines or visible dirt accumulates.
- Watch for decreased suction, increased dust around the filter, or persistent odors indicating it’s time for a swap.
- Use indicator lights; a blinking yellow or red light signals the need for filter replacement.
- Regularly inspect and clean washable filters; replace damaged or heavily soiled filters promptly.
- Follow manufacturer guidelines and your vacuum’s performance cues to avoid guesswork and overbuying.

BISSELL Little Green HydroSteam Multi-Purpose Portable Carpet and Upholstery Cleaner, Car and Auto Detailer, 3618
EVERY PURCHASE SAVES PETS. BISSELL proudly supports BISSELL Pet Foundation and its mission to help save homeless pets.
As an affiliate, we earn on qualifying purchases.
When Should You Replace Your Vacuum Filter?
How do you know when it’s time to replace your vacuum filter? The key is understanding the filter lifespan and replacement frequency. Most filters last between three to six months with regular use, but this can vary depending on your vacuum model and how often you clean. If you notice decreased suction or your vacuum isn’t performing as well, it might be time for a new filter. Check your manufacturer’s recommendations for specific timelines, but don’t wait too long—overused filters can trap dust and allergens less effectively, impacting air quality. Regularly replacing your vacuum filter ensures peak performance and prolongs your vacuum’s lifespan. Keep an eye on filter longevity to maintain optimal cleaning efficiency and air quality. Additionally, monitoring filter performance can help you determine the best time for replacement before issues arise. Understanding the filter lifespan is crucial for maintaining a healthy indoor environment and ensuring your vacuum operates efficiently over time. Being aware of signs like odor emission can also guide you in timely filter replacement to prevent unpleasant smells from building up.

Rivenara Carpet Cleaner Machine Upholstery - 450W Shampooer Couch Cleaning Portable Vacuum Rug Sofa Car Seat Fabric Mattress Pet Spot Extractor for Furniture Water Hand Held Scrubber Small Deep Washer
Carpet cleaner machine: Combining spray, brush, and suction functions, the Carpet cleaner delivers effective spot cleaning to effortlessly...
As an affiliate, we earn on qualifying purchases.
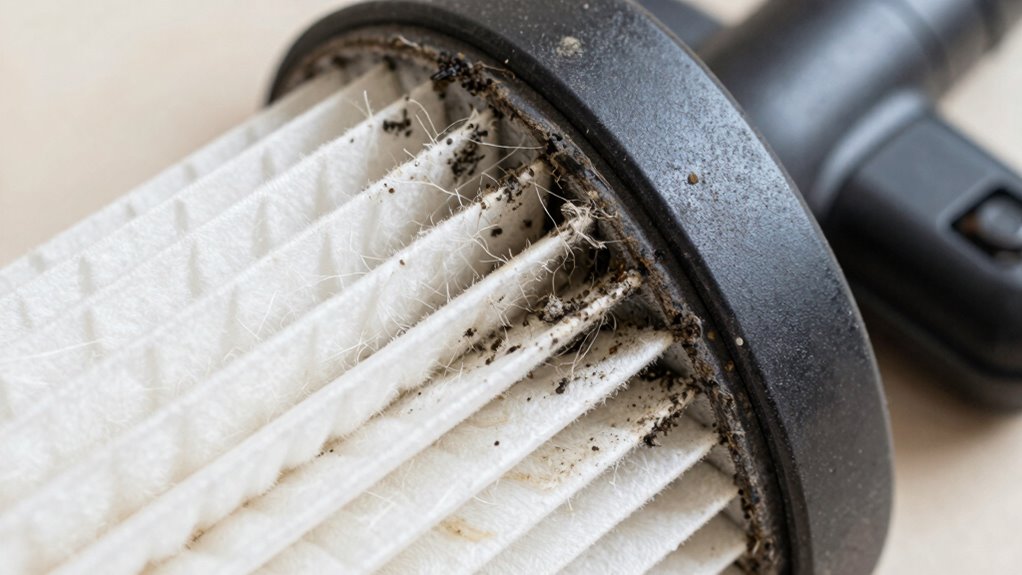
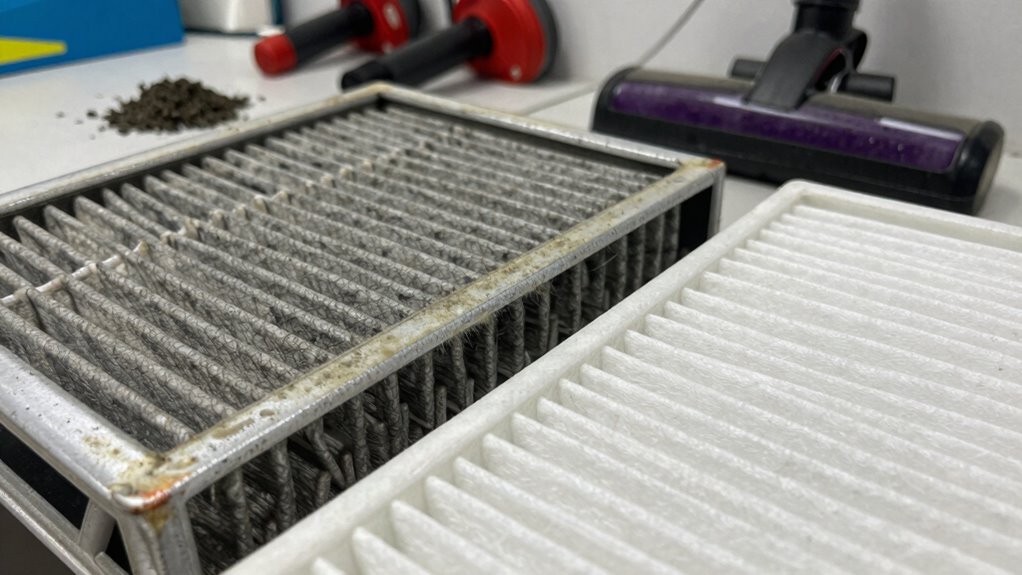
What Visible Signs Indicate You Need a New Filter?
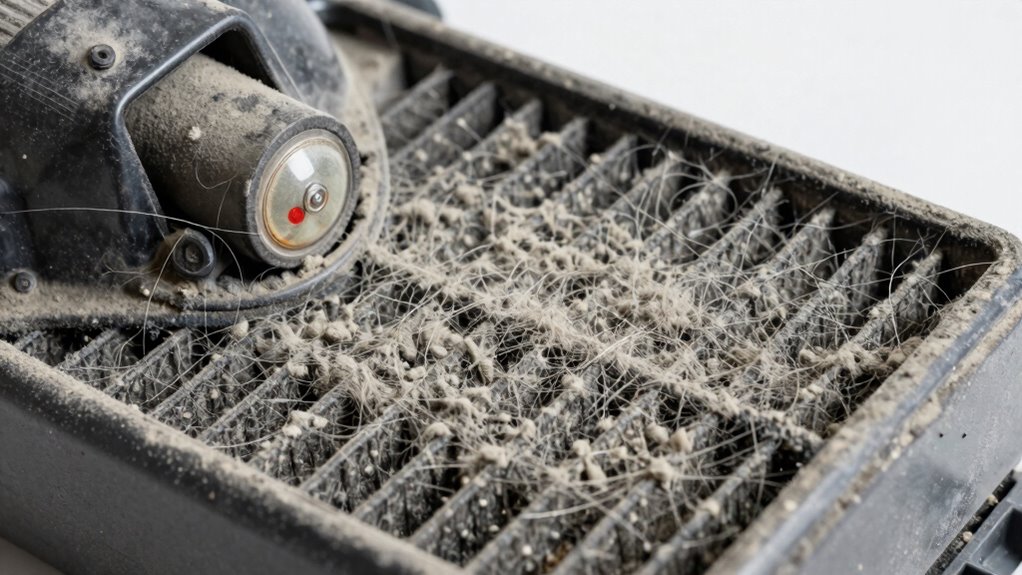
Are you noticing your vacuum isn’t cleaning as effectively as it used to? Visible signs can help you determine if it’s time to replace the filter. One clear indicator is excessive dust buildup around the filter, signaling it’s clogged and no longer functional. You might also see the filter turning gray or brown, showing it’s past its filter lifespan. Additionally, if the vacuum’s suction power has dropped noticeably, it’s a sign the filter needs replacing. Finally, if you notice a persistent musty or dusty smell during use, it’s likely due to a dirty filter. Regularly inspecting your filter for these signs can prevent performance issues and maintain air quality. Also, considering the type of filter, such as a flat iron bike filter, can help you choose the right replacement to ensure optimal cleaning performance. Don’t wait until it’s too late—trust your eyes to guide filter replacement. Proper maintenance of your vacuum filtration system is essential for keeping your vacuum working efficiently and prolonging its lifespan. Recognizing these visual cues can help you prevent costly repairs and keep your vacuum operating at peak efficiency. Being aware of filter replacement intervals can further assist in timely maintenance and avoid unexpected breakdowns.
Amazon Product B0GWCD8L6D
As an affiliate, we earn on qualifying purchases.
How Can You Use Indicator Lights to Know When to Change Filters?
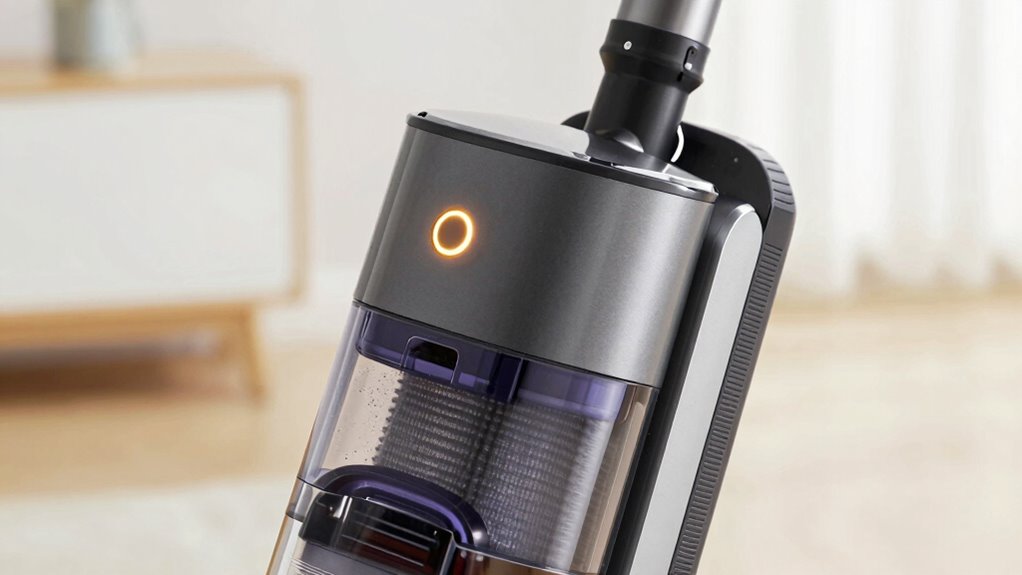
Indicator lights on your vacuum can provide a straightforward way to determine when it’s time to change the filter. Many models include a filter alert that monitors filter lifespan and reflects indicator accuracy. When the light activates, it suggests the filter is clogged or reaching the end of its effective life, ensuring you don’t rely solely on guesswork. Keep in mind, some indicators may be more precise than others, so understanding their signals helps you maintain ideal performance. Here’s a quick guide:
| Indicator Light Status | Meaning | Recommended Action |
|---|---|---|
| Steady Green | Filter is clean | No action needed |
| Blinking Yellow | Filter nearing end of lifespan | Prepare to replace |
| Solid Red | Filter needs replacing now | Change filter immediately |
| Off | No alert | Check if filter is clean |
| Intermittent Light | Indicator accuracy varies | Verify performance manually |
Additionally, Vetted – Soaring Skyways recommends consulting your vacuum’s user manual for specific guidance related to your model’s indicator system.

BISSELL Little Green Mini Portable Carpet and Upholstery Deep Cleaner, Car/Auto Detailer, with HydroRinse Self-Cleaning Tool and 4" Tough Stain Tool, Tea Green, 4075
EVERY PURCHASE SAVES PETS. Every purchase makes it possible for BISSELL to continue our support of BISSELL Pet...
As an affiliate, we earn on qualifying purchases.
How Often Should You Replace Your Vacuum Filter? Setting a Routine
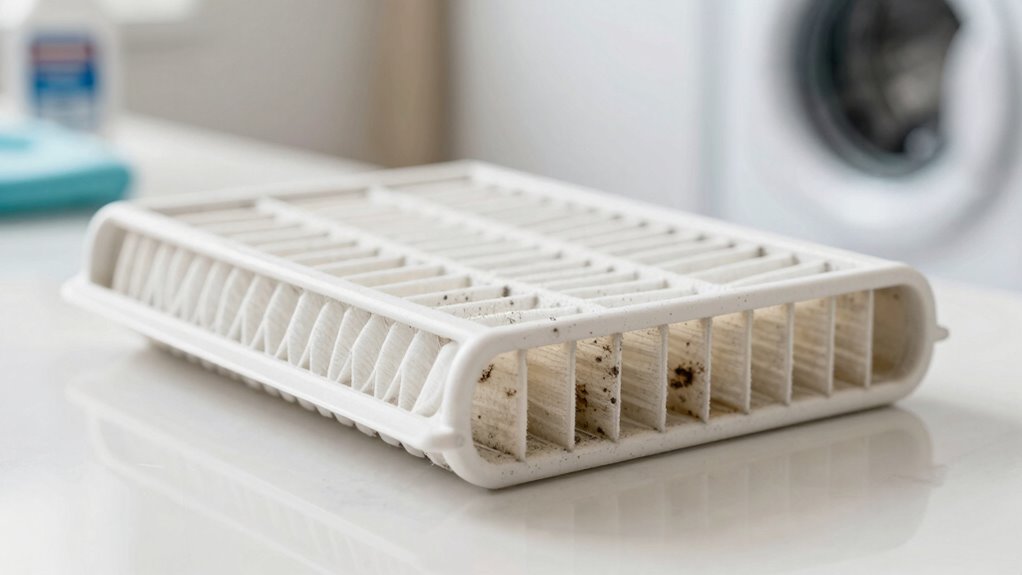
Establishing a regular schedule for replacing your vacuum filter guarantees your machine performs at its best and maintains good indoor air quality. Consistent filter maintenance not only prolongs filter longevity but also ensures ideal suction power. To set a routine, consider how often you use your vacuum and the environment’s dust level. For most households, replacing the filter every 3 to 6 months works well. Keep an eye on these signs to adjust your schedule:
Regularly replacing your vacuum filter ensures optimal performance and fresh indoor air quality.
- Reduced suction performance
- Visible dirt buildup on the filter
- Unpleasant odors during use
- Increased dust in the air after cleaning
Understanding dust settling patterns can help you better understand how dust and debris naturally settle and affect your indoor environment over time. Additionally, understanding Personality Tests can provide insights into personal habits, including maintenance routines, which can help you develop consistent practices. Regularly inspecting your filter and staying aware of these indicators can lead to more effective maintenance routines, especially considering how indoor air quality impacts overall health and comfort in your home.
How to Check and Replace Your Vacuum Filter Step-by-Step
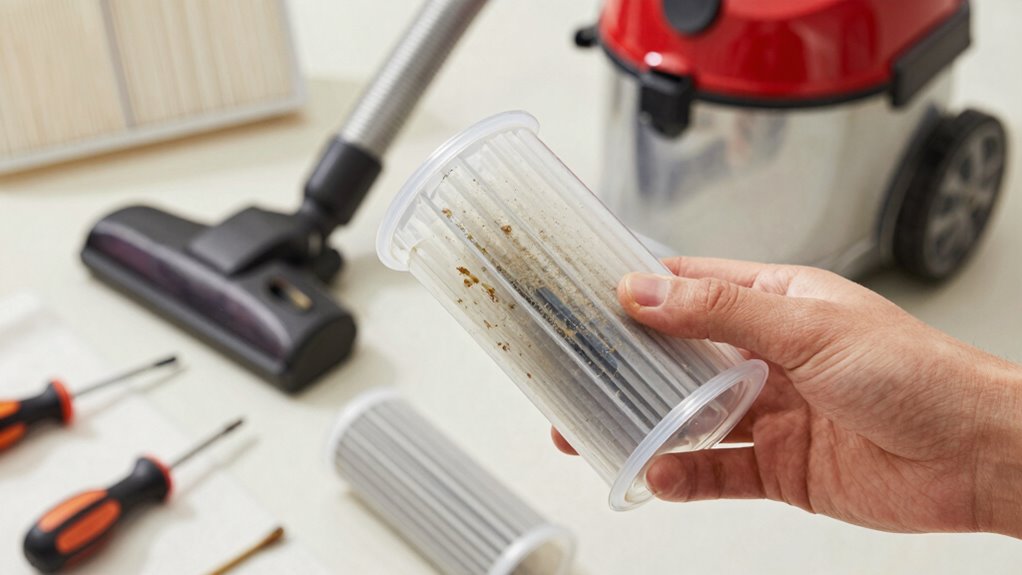
To check and replace your vacuum filter effectively, start by unplugging the vacuum to guarantee safety. Begin with filter maintenance by locating your filter, usually inside the dustbin or behind a panel. Remove the filter carefully, following your vacuum’s manual. Use cleaning techniques like gentle brushing or rinsing (if washable) to remove dust and debris. Inspect the filter for signs of wear, damage, or excessive dirt. If it’s dirty but still intact, clean it thoroughly and let it dry completely before reinstalling. If it’s damaged or overly dirty, replace it with a new filter. Regular filter maintenance ensures ideal performance and prolongs your vacuum’s life. Understanding the Power of Imagination can also help you visualize the benefits of maintaining your vacuum, such as improved cleaning efficiency and extended appliance lifespan. Recognizing filter lifespan based on usage and conditions can help you anticipate when a replacement is necessary, preventing performance issues. Additionally, being aware of air quality considerations can guide you in choosing the right filter type for your environment. Proper filter care can also be enhanced by understanding effective cleaning techniques, ensuring optimal results and longevity.
Frequently Asked Questions
Can Using a Dirty Filter Affect My Vacuum’s Motor Lifespan?
Using a dirty filter can definitely harm your vacuum’s motor lifespan. When you neglect filter maintenance, airflow gets restricted, forcing the motor to work harder and overheat. This extra strain shortens the vacuum’s longevity and can lead to costly repairs or replacements. To keep your vacuum running smoothly and extend its life, replace or clean filters regularly. Proper filter maintenance is key to maintaining best vacuum performance and protecting your investment.
Are There Specific Filter Types That Last Longer Than Others?
Ironically, some filters seem to last forever, like HEPA filters made from durable materials designed for longevity. These tend to have better filter longevity and material durability, meaning you won’t need to replace them as often. In contrast, foam or paper filters wear out quicker. So, if you want your vacuum to keep up without constant replacements, opt for filters built with high-quality, durable materials.
How Do I Dispose of Used Vacuum Filters Properly?
You should dispose of used vacuum filters by checking if they’re recyclable or need special disposal. For eco-friendly disposal, remove the filter and place it in your regular trash if non-recyclable. If it’s recyclable, rinse it if possible and then recycle according to local guidelines. Always follow manufacturer instructions for disposal, and consider using reusable filters to reduce waste and support eco-friendly disposal practices.
Do HEPA Filters Require Different Replacement Intervals?
HEPA filters do require different replacement intervals because they need regular HEPA maintenance to stay effective. Typically, you should replace a HEPA filter every 6 to 12 months, but this depends on usage and air quality. Keep an eye on the filter’s lifespan and signs of dirt buildup. Regularly checking and replacing it ensures maximum filtration and indoor air quality, preventing unnecessary strain on your vacuum.
Can Cleaning a Filter Extend Its Usability Before Replacement?
Cleaning your vacuum filter can sometimes breathe new life into it, much like giving it a fresh coat of paint. Proper filter maintenance using gentle cleaning techniques, such as rinsing or tapping out debris, can extend its usability. However, don’t rely solely on cleaning—monitor for signs of wear or reduced suction. Regularly check your filter’s condition to guarantee it works efficiently and replace it when necessary to maintain ideal cleaning performance.
Conclusion
Think of your vacuum filter as the knight’s shield in a battle against dust. When it’s worn, the fight becomes tougher, and your home suffers. By paying attention to signs and routine checks, you guarantee your shield stays strong. Replace it when needed, just like invigorating armor before the next challenge. Staying vigilant keeps your home’s air clean and your vacuum ready to conquer dirt—so don’t wait for the dragon to appear before acting.